Getting started with EM•Script
EM•Script requires a cross-development environment consisting of hosted software tools which will compile and load executable programs onto target MCU hardware. For the host, you can use a PC running Windows, Linux, or MacOS; for the target, you can choose any MCU board for which a corresponding em$distro support package already exists.
Before turning to the EM•Script SDK (described next), you should first install or upgrade the following tooling environments on your host PC:
| Node.js | version 18.0.0 or later | execute node --version to verify |
| VS Code | version 1.90.0 or later | execute code --version to verify |
Do not proceed forward if these verification checks should fail !!!
If you don't already have a recent version of the Git Bash shell, you should also install Git for Windows. To verify your setup, ensure that the node and code commands from the previous table operate correctly under Git Bash.
You must also configure npm to use Git Bash as its default shell. The following command reflects the default installation directory for Git Bash:
$ npm config set script-shell 'C:\Program Files\Git\usr\bin\bash'Going forward, all command-line examples will presume your use of this shell.
Software development kit
You'll provision the latest EM•Script SDK onto your host PC in three simple steps, each using the Node Package Manager npm command delivered as of Node.js:
prepare a new folder, which we'll logically name «your-sdk» going forward
install SDK tooling and content, plus some 3rd party compilers and loaders
verify that you can build (and optionally run) a sample EM•Script program
Step uses the npm command to initialize a newly-created «your-sdk» installation folder somewhere on your PC:
[~]
$ mkdir emscript-sdk; cd emscript-sdk

[~/emscript-sdk]
$ npm init -y
  ...

[~/emscript-sdk]
$ ▮
For simplicity, we've elected to use ~/emscript-sdk as our logical «your-sdk» folder. Feel free to name and locate this folder anywhere in the file system.
Step uses the npm command to populate your current «your-sdk» folder with tooling and content comprising the EM•Script SDK:
[«your-sdk»]
$ npm install @em-foundation/emscript-sdk
  ...
added 11 packages, and audited 12 packages in 26s
  ...
Use the npm list command with its --depth=1 or --all option for more information.
Step finally verifies your EM•Script installation by building a small program:
[«your-sdk»]
$ npm run verify-build

> emscript-cli@26.1.0 verify-build
> sh -c '(cd workspace; npx emscript-cli build --unit em.core/em.examples.basic/Ex02_BlinkerP.em.ts)'
building ‘em.examples.basic/Ex02_BlinkerP’ ...
    using setup ‘ti.cc23xx://default’ with board ‘LP_EM_CC2340R5’
    executed ‘em$meta’ program, generated ‘main.cpp’ using [31/62] units in 0.90 seconds
compiling ‘main.cpp’ ...
    image sha32: 1dc95979
    image size: text (1212) + const (12) + data (0) + bss (16)
done in 1.80 seconds

[«your-sdk»]
$ ▮
Target MCU hardware
The SDK contains all tooling needed to compile and load EM•Script programs targeting different MCU development boards. While we encourage you to purchase one of these boards, you can still learn about EM•Script by building (but not running) some sample programs.
The Texas Instruments CC2340R5 wireless MCU features an Arm Cortex-M0+ CPU together with a familiar suite of peripherals – including a generic 2.4 GHz radio with BLE 5.x support. Texas Instruments also offers an inexpensive LP-EM-CC2340R5 evaluation board in their familiar LaunchPad format – available from TI as well as their distributors.
You should also purchase this emulator board from TI – unless you already own a "classic" TI LaunchPad with on-board XDS110 support. In that case, you can easily connect a legacy LP to your new LP-EM-CC2340R5 board using a cable supplied by TI. If you haven't used an XDS110 before, run the «your-sdk»/tools/ti-uniflash/one_time_setup script.
We'll soon verify that your LP-EM-CC2340R5 hardware works in concert with the SDK by building and loading our sample EM•Script program.
VS Code extension
To flatten your learning curve, we strongly encourage using our EM•Script Extension which you can install after launching VS Code from the command-line:
[«your-sdk»]
$ code .Our EM•Script Extension currently requires that you launch VS Code from the Git Bash shell.
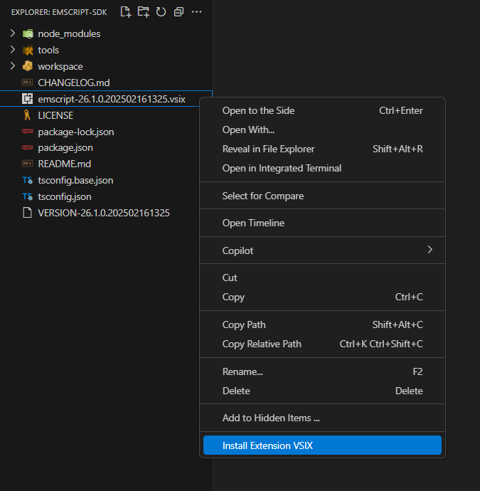
Once inside, you'll see a top-level listing of «your-sdk» folder. From here, right-click on the .vsix file and select Install Extension VSIX:
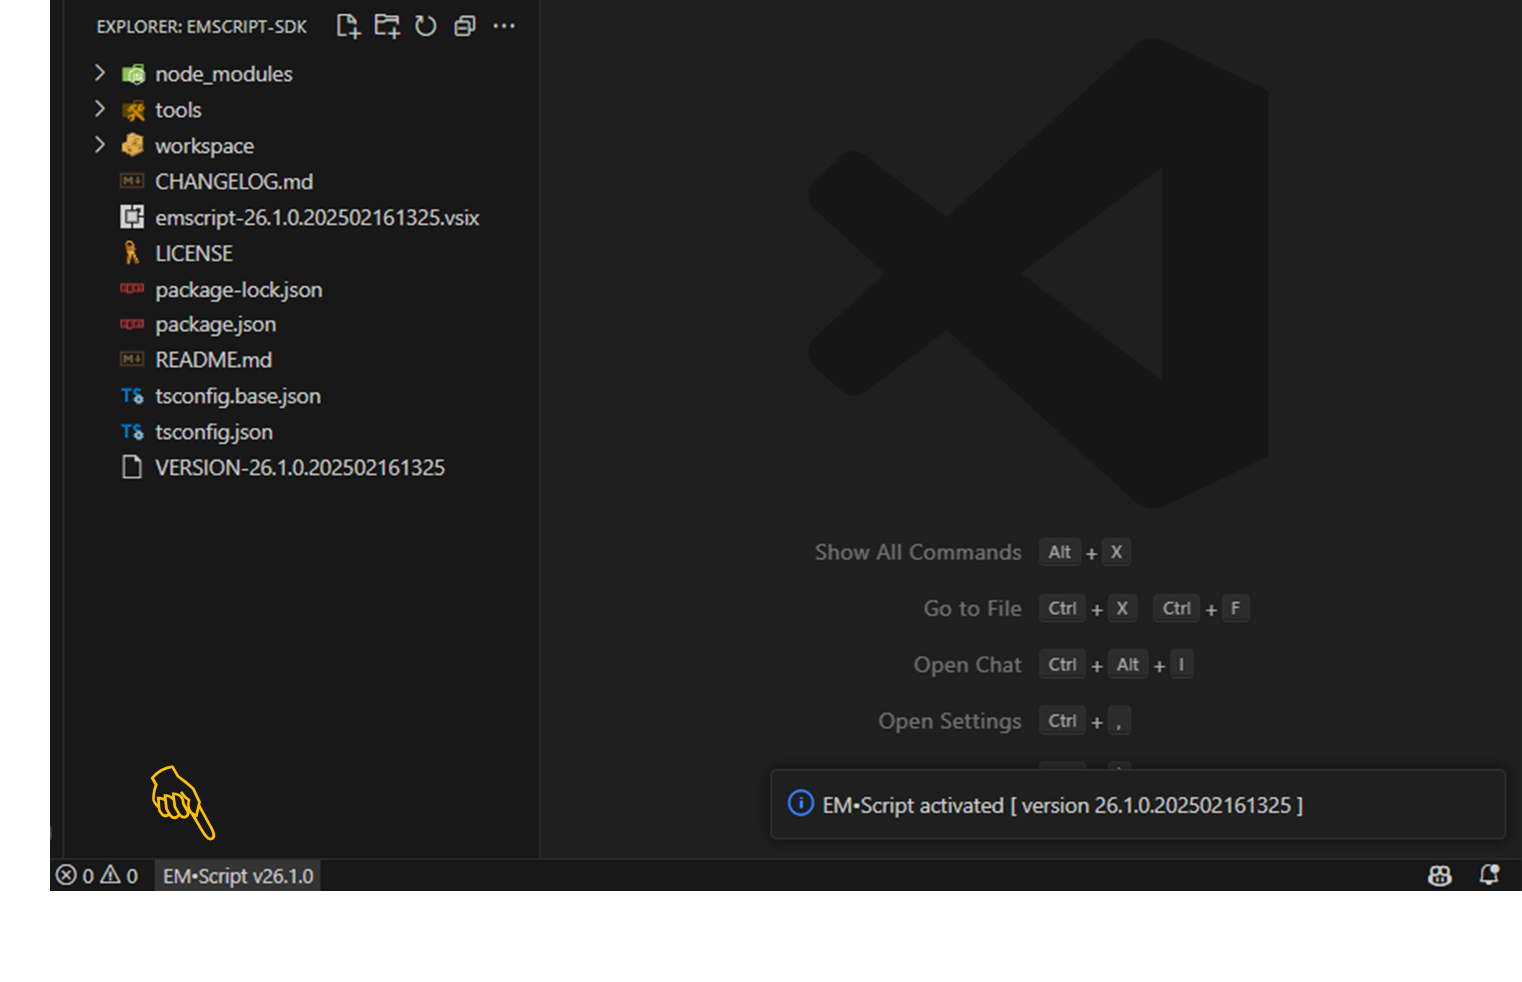
If all goes well, you should now see a clickable-item in the VS Code status bar which confirms the full version of the EM•Script extension currently active.
From here, you can drill-down into the «your-sdk»/workspace sub-folder and explore the software content which EM•Script can build and load onto your target MCU hardware.
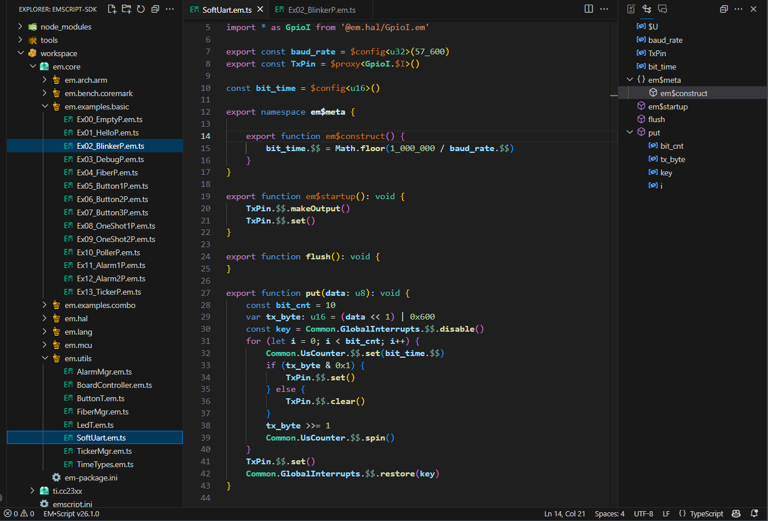
Our EM•Script extension supports features already familiar to VS Code users – syntax highlighting, code navigation, outline views, hover help, intellisense completion, and many more.
Command line
The SDK contains an emscript command-line tool which compiles and loads programs for your target MCU hardware. Used internally by npm run verify-build as part of installation step , you can access the emscript command directly from your PC's shell.
You'll find the emscript executable in «your-sdk»/node_modules/emscript-cli/bin/. Add this folder to your $PATH or else reference emscript with a named link or alias. To verify:
$ emscript --version
26.1.0.202502161325
The emscript build sub-command will serve as your primary entry-point when working with EM•Script. Typically invoked inside the «your-sdk»/workspace sub-folder, let's now build the same target program used to verify the SDK installation:
[«your-sdk»/workspace]
$ emscript build --unit em.core/em.examples.basic/Ex02_BlinkerP.em.ts
building ‘em.examples.basic/Ex02_BlinkerP’ ...
    using setup ‘ti.cc23xx://default’ with board ‘LP_EM_CC2340R5’
    executed ‘em$meta’ program, generated ‘main.cpp’ using [31/62] units in 0.90 seconds
compiling ‘main.cpp’ ...
    image sha32: 1dc95979
    image size: text (1212) + const (12) + data (0) + bss (16)
done in 1.80 seconds
To confirm operation of your target MCU hardware, simply append the --load option to the same command:
[«your-sdk»/workspace]
$ emscript build --unit em.core/em.examples.basic/Ex02_BlinkerP.em.ts --load
building ‘em.examples.basic/Ex02_BlinkerP’ ...
  ...
done in 1.80 seconds
loading ‘em.examples.basic/Ex02_BlinkerP’ ...
done
If you now see an on-board (green) LED blink five times, go out and celebrate.... 
Happy coding !!! 
